Rubbings as Projections
Overview
This activity introduces children to the abstract concept of projections from 3 dimensional space onto 2 dimensional space in a concrete and age appropriate way by using rubbings of objects with interesting surfaces. The activity is written for a Kindergarten class, but could easily be adjusted for other early elementary students. The activity takes 30-50 minutes. The main portion of the directions are below, but the full version is here: Rubbings as Projections (including the coin equation handout).
Large group Introduction
- Demonstrate how to take a rubbing (I used the bottom of my shoe)
- Discuss what information is preserved in the rubbing (tallest portions) and what is lost (color, how far down the lower parts are)
- Discuss three dimensions versus two dimensions. If you can only see one side of something, say the top, you don’t know very much about it. Cone upside down looks the same as a cylinder from the top. Cube and rectangular prism look the same from the top (if the rectangular prism is oriented correctly). If you can only see my back, you don’t know how many buttons my shirt has.
- (optional) Show an object, have students predict what rubbing will look like, take the rubbing and discuss (possibly do this two or three times)
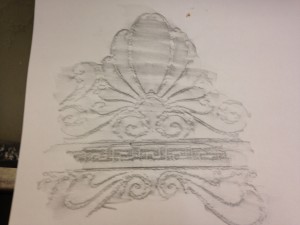
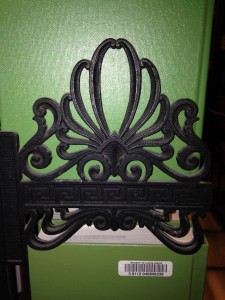
- Get out the matching cards (RubbingsAsProjections-MatchingCards). Pass out the pictures of the rubbings to groups of students Show the pictures of the objects one at a time on the Elmo/smart board/by holding them up. Students should try to pick out the picture of the rubbing that goes with the object. Here’s a sample pair:
Small group “centers” done in rotation (pick four to do-I think the first four are the best)
- Doing Rubbings-each student should make a rubbing of the bottom of their shoe.
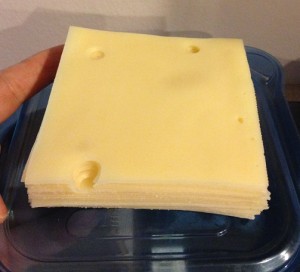
- Tallest Portions-cut off and look at the tallest portions of Swiss Cheese, an apple, carrot with the greens still attached, angel food cake, loaf of bread, pear, or similar food objects. Draw a picture. (“Remember a rubbing is basically taking the top layer of something, so at this station we are going to cut off the top layer of some food.” First I cut the top off the apple (using a kiddie safety knife), “what does this top layer tell us about the rest of it?” Then used the corer slicer to cut the apple into 3 wedges which the students ate. Then I help up a small piece of the carrot leaves. “What do you think this is the top layer of?” Students knew it was a plant, but didn’t know which one. Then I got the carrot out of my bag and talked about how the top layer was very different from the main part. Some students wanted to try the carrot too. For the Swiss cheese I used a package of thin sandwich slices, which I carefully stacked up into the original block they would have come from.

 “What would it look like if I cut off the top layer of this?” “Is this more like the apple or the carrot?” Students also wanted to try the Swiss cheese. I gave each only a quarter of a slice. Many students didn’t like it, so I said to spit it out and congratulated them for trying something knew).
 - Memory- Play concentration/memory with the matching cards. The matched pairs are the picture of the object and the picture of the rubbing.
- Coin equations-Rubbings of coins to make equations with gray and orange crayons-see attached handout.
- Rubbing Predictions-Given several interesting objects predict what the rubbings would look like and then take rubbings.
- Self Portrait—Have the students think about what their top layer is and the draw a picture of what they would look like as seem from above. It may help to have group members take turns sitting on the floor for a few seconds so others can see what they look like from that angle. (My hunch is this is too hard for Kindergarten, but could work for older kids).


8:06 pm - 7-22-2016
Nice point of view. Never thought about that before. Should be interesting!